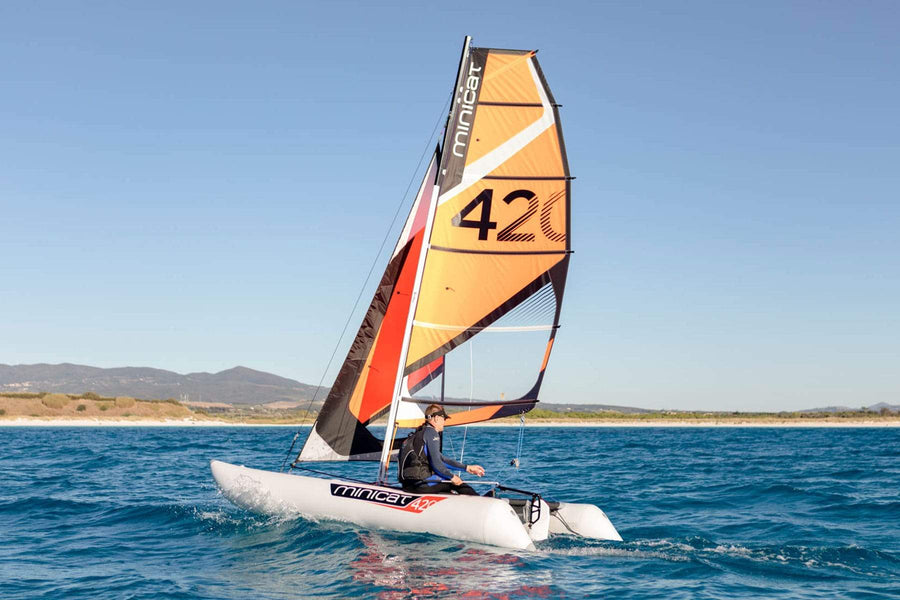
You've enjoyed your first adventure on the MiniCat 420, and now you're wondering how to pack it away.
Don't fret! This guide explains how to pack away a MiniCat 420 safely and without risk of damage. Simply follow these steps and you’ll have your sailboat neatly stored in no time.
Step 1: Preparation
One of the main advantages of owning an inflatable catamaran is that it takes less time to pack away than it does to brew and drink a cup of coffee!
Start by preparing your MiniCat 420 for storage.
First, it should be completely dry. It's best to let it air dry in the shade to protect it from UV rays.
Second, if you've been sailing in saltwater, rinse it thoroughly with freshwater to remove corrosive salt.
If it's not possible to do either of these things at the sailing site, you can temporarily pack the boat and complete these steps at the storage site.
Step 2: Lower the Mainsail
With your catamaran prepped, you’re ready to take down the mainsail.
-
Release the Vang and unhook it from the base of the mast. Leave it attached to the boom for now.
-
Disconnect the mainsheet from the end of the boom.
-
Loosen the outhaul and remove the boom end cap. This will allow you to twist and pull the boom toward you to detach it completely. Set the boom aside.
-
Unclip the halyard and slowly lower the mainsail while guiding it with one hand.
-
Roll the sail neatly as you bring it down, using the bolt rope to help maintain tightness.
Tip: Although it can be done by one person, it's easier to get someone to help you lower the mainsail.
Tip: Point the boat into the wind to make lowing the sail easier.
Step 3: Coil and Store the Mainsail
Once the sail is fully released from its track, extract the halyard from the mast. Coil it flat and secure it neatly with a self-contained loop.
-
Fold the head of the sail over itself so the top batten is parallel to the next batten down.
-
Insert your hand into the end and twist the sail around to create a tighter coil and a more compact size.
-
Place the sail into the storage bag, inserting the batten ends first.
-
Coil and tidy the mainsheet for storage and secure with a half-hitch knot.
Step 4: Remove the Jib
Untie the jib sheets and pull them through the fairleads.
-
Use the furler to spin the sheets around the jib and secure them into place using a simple hitch knot to prevent flapping.
-
Pull out the rest of the halyard and lower the jib halyard by pulling it out of its fixings.
-
Coil the jib halyard using the same method as the main halyard so it's neatly secured.
-
Unclip the furler from both top and the bowsprit, and clip the top and bottom jib carabiners together.
-
Fold the jib in half and pack it neatly into the sail bag.
Step 5: Remove the Rudder
Head to the rudder and, starting with the bottom one, pull the thumb rings to release the rudder pins.
-
Attach the pins back onto the rudder.
-
Keep the tiller extension attached to the rudder—there's no need to remove it.
Step 6: Lower and Detach the Mast
To lower the mast, you must first release the forestay tension by loosening and releasing the knot.
-
Carefully lower the mast by grabbing it high up and lifting slightly to release it.
-
Lay the mast down on the trampoline. Disconnect the rigging and separate the mast into sections.
-
Place mast sections into the mast bag.
-
Disconnect the side stay wires from the boat's frame. Untangle and coil them neatly. Wrap the stay wires around themselves loosely to prevent tangling.
-
Detach the forestay from the bowsprit, coil it, and secure it for storage.
Step 7: Detach Underwiring & Dolphin Striker
Lift the trampoline to release the underwiring tension. You'll then be able to disconnect the bowsprit from the boat's frame. Lay it on the trampoline.
-
Disconnect the shackles under the boat's frame.
-
Remove the thumb ring and unscrew the dolphin striker. Replace the thumb ring so you don't lose them.
-
Unclip the rear snap shackles from the stern rigging and coil the underwires.
Step 8: Deflate the Hulls and Remove the Keels
Deflating the hulls is a quick process. First, unscrew the safety caps (anti-clockwise) from the hull valves. Then, press the red button to open the check valve and release the air.
-
Push the boat upwards to reveal the keel.
-
Firmly grab the keel and give it a strong jerk forward to release the back end, and then a strong jerk in the opposite direction to release the other side.
-
Repeat the process for the second keel and set them aside.
Step 9: Detach the Hulls from the Trampoline
Head to one of the hull attachments and place your hand underneath from behind. You should be able to push and release the hull from its attachment.
-
Repeat the process for the three other hull attachments.
-
Flatten the hulls on the ground with the keel strip facing upwards along the bottom edge.
-
Allow the fabric weight to squeeze out the remaining air.
Step 10: Unlace the Trampoline
-
Unclip the cleat at the rear of the trampoline.
-
Pull back the lacing completely from the rear edge.
-
Loosen the remaining side laces gradually, pulling slack down the entire line.
-
Remove the sidebars with cleats through their pockets, lifting the trampoline off the frame.
Step 11: Roll & Pack the Trampoline
Stand the trampoline on its end and release the lacing cleat. Unravel all the lacing from the back edge.
-
Now, loosen the lacing on the side of the trampoline, but don't remove it.
-
Remove the stern crossbar, and then release and remove the sidebars.
-
Roll the trampoline around the bow crossbar, ensuring it's between the two elbow joints.
Step 12: Pack the Non-Trampoline Gear Bag
Start loading the first gear bag (the largest one) in the following order:
-
Lay the mast bag flat at the bottom of the bag.
-
Place the boom and bowsprit on top.
-
Arrange the side frame pieces along either side of the sail bag for stability.
-
Place the keels on top of everything with the curved edges facing inwards.
-
Position the sail bag between the keels.
-
Place the rudder on top and zip up the bag.
Step 13: Pack the Trampoline & Hull Bag
In the second bag, load the gear and fold the hulls in the following order:
-
Lay the stern crossbar first, then add the bow crossbar with the trampoline alongside it.
-
Add the wires in at one end of the bag and all the lines at the other end.
-
Fold the first hull, long top edge to the long bottom edge (like a hot dog!).
-
Find the start of the keel patch and fold the hull inwards.
-
Fold the other end so it extends beyond the previous fold (past the bow), then fold it back on itself to make a neat shape.
-
Squeeze out all excess air and secure the valve to prevent more air from entering.
-
Repeat the process with the second hull.
-
Lay the hulls in the bag, one facing upwards and the other downwards, so they fit neatly together.
Zip up the bag and your MiniCat is now ready to be stored while waiting for your next sailing adventure!
Compared with a traditional catamaran, the pack-up process for this small sailboat is super straightforward. Plus, the two bags are quite compact and can be easily stored in your vehicle.
FAQs
What is the pressure on a MiniCat 420?
The hulls of the MiniCat 420 are designed to be inflated to a pressure of 0.25 bar (approximately 3.7 psi). This is the optimal pressure for proper rigidity and performance of these portable sailboats.
What is the top speed of the MiniCat 420?
The top speed of the MiniCat 420 is around 15 knots, while a typical cruising speed is about 10 knots.
Faster versions of the MiniCat include the 460 and the 520 Explorer. Both are capable of cruising at 18+ knots.
How much does a new 420 sailboat cost?
The cost of a MiniCat 420 starts at $6,750, varying by model and accessories included.
What are the models of the MiniCat 420?
The current models of the MiniCat 420 include:
-
Instinct: With a boomless mainsail.
-
Emotion: Monofilm mainsail and aluminum bowsprit, boom, and frame.
-
Evoque: Carbon fiber version of Emotion.
-
Laura Dekker Edition: Special color scheme and carbon fiber.
-
Carbon Red Beard Sailing Special Edition: Carbon fiber mast and included traveler.
Final Thoughts
We love the ease and simplicity of setting up and packing away the MiniCat series.
Whether it's the 420, the MiniCat Guppy, or another model like the 310, they all follow a user-friendly process that sailors of any experience level can quickly master.
As always, Red Beard Sailing remains at your disposal if you have any questions or concerns about dismantling your boat. Even if you're a first-timer who needs a few sailing tips, we welcome you to get in touch.